Friday 28 February 2014

The little girls dressing table.

Hi,

Remember I won this auction yesterday?:

Well, I thought it was a bit of a bargain. 

..until I got it home. 

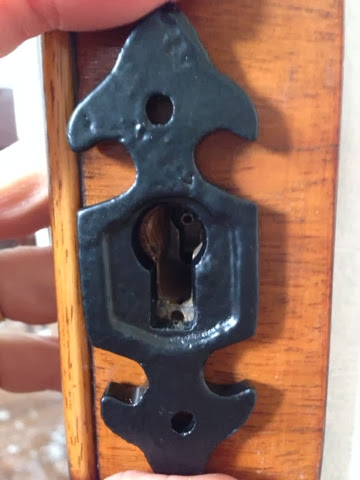
There are quite a few things that need attention. 

The bottom drawer does not close as the wood trim at the bottom has been put back on VERY badly:


There are nails sticking out here, there and everywhere which need removing as they could injure someone:


Sadly the mirror is not affixed to the chipboard backing either and has slipped down because the plastic trim holding it on position has stretched and split:


First things first, out have come the 2 inch nails which was pretty tricky and have given me blood blisters!

The mirror is now in the process of being firmly glued to the backing. 

I intend to create a new border of lace eventually around the mirror and backboard to hide the ugliness of the chip board and to make it more worthy of a little girl's bedroom (for such is how I envision its new home). 

The size is so incredibly teeny tiny that only a little princess could use the mirror. 

I am hoping to crochet a string of hearts to swag over the mirror too for practicality as I use similar on my own mirror to house my earrings:


I think a little girl would appreciate that :)

I can't wait to start painting but will have to exercise patience. 

Its a shame so much has to be done to it before I begin but at least it will be safe for its new little owner when it finally gets its forever home. :)

Well, I'm off to put the mirror somewhere no one can knock it as it affixes. 

Catch you later, 

X


Thursday 27 February 2014

You've been framed...

Hi, 

Today's activities have been pivoted around a frame that needed to be tweaked to complete my repurposed drinks cabinet. 

Previously on the wall there had been this picture (faces deliberately blurred) in a horrible ikea frame:

Yuck, right?!

Well I managed to pick up a gilt edged frame with no back or glass from a charity shop:


I simply cut a piece from the back of the modern frame and cut the Perspex to fit too:

Then I put it together with a little bit of trimming on the photo which was still a wee bit too big:


It still didn't quite look right. 

I mixed up some chalk paint and applied coats and rubbed off the detailing after each coat had dried:


Easy peasy, squeeze of lemon!!

And here it is:


A million times better than the original pic, yeah?

Other day's news is that the little French Grey Rose set sadly needs a forever home :(


And last, but by no means least, I just won this in an eBay auction:


Another Beauty and the Beast challenge. 

Looking forward to changing its hideousness into exquisite prettiness over the next week. 

Can't wait to pick it up!!!

Woohooooo


Catch you soon, peeps x


Wednesday 26 February 2014

The repurposed drinks cabinet

Hi,

As promised, here is the update on the Art Deco drinks cabinet. 

Here is a reminder if how it looked:


The 70s mirror tiles at the back were truly hideous and hanging off. 

It was time for a rehaul. 


I made up a French Grey colour with mixing testers in a very good quality white emulsion then I turned it into chalk paint batches as coats were needed. 

 
The shell escutcheons were both broken too so I ordered some plain black metal ones and made them into a pewter effect with stippling several paints:


Then it was a case of lining the back with toile paper from B&Q which is divine (although pricey at £20 a roll!)


A bit of wax, a bit of distressing and it is finished. 

All my tea sets have been rehomed very well (well, not quite ALL of them...)

The drinks drawer needs further sanding as I chose not to paint it so as to provide a contrast but this will be done inbetween other jobs. 

And this is it:


And best of all...

Hubster has let me KEEP IT!!!!

Woohooooo!!!


(Please ignore the other projects cluttering up the corner. 

The storage chest will be rehomed over the weekend and the French Grey Rose set is still for sale.)

Have a great day x


Tuesday 25 February 2014

Wax on, wax off. Phew!

Can you remember the Jacobean oak storage chest I bought recently?:

I wanted to play around with the dark wax I had bought so thought this would be a good piece to practice on. 

I painted it in antique white and cashmere chalk paint then gave it a clear and dark wax finish and some distressing. 


It has a gothic window carving on the front panels which are topped with an acorn relief so I tried to restrict the dark wax just to those areas. 

I am not entirely happy with it and see I need a LOT more practice. 

I did promise on the initial blog that I would be sharing my successes AND failures of my learning journey though so here it is:


I will need to work on greasing my elbows for future projects. 

A couple of wax brushes would definitely be an investment too as lint cloths just don't seen to cut it for applying wax satisfactorily. 

All part of the learning process though :)

My cabinet is nearly complete so I will be sharing the latest results with you soon :)

Have a nice day, peeps x

Monday 24 February 2014

French Grey Roses and reupholstered stool.


Finally finished a few more items. :D

I've just put the final coat of wax on the display and the nest of tables that I started a few days ago. 


I'm very happy with them and learned a few things along the way (which is what I always try to do!). 

I picked up sneaky way to make bespoke stencils for free, created a colour to match the chart without breaking the bank and BUYING the one I wanted and got a bit more practice waxing. 

They are now gonna have to be sold to make room for more practice pieces but I don't mind them being sold cheaply as I got so much pleasure with the experience :)

I also picked up the stool at the boot sales if you can remember?

This has now been reupholstered, painted and waxed:

I used a dark wax over the clear for the first time. 

(It was my first time at reupholstering too!!!!)

The results look sooooo aged which is kind of quirky. 

I don't think I will be doing it on my antique white items that I have done already but it looks good on the stool. :)

I'm off to start another project now....


Catch you laters x x


Sunday 23 February 2014

Boot treasures

So today's early morning alarm did not go off in vain. 

My mad scurry around the boot sale at 8am bore a little fruit which I thought I would share with you:

Here we have..

£3 Retro suitcase

£2 cute pair of heels

£1 massive bundle of matching doilies for crafting with. 

80p bundle of chintzy furniture handles. 

35p lidded ceramic crock

50p Masons vintage gravy jug

£2 stool

£1 for dinky vintage china cup and saucers. 

There was a lovely brooch for 50p too but it was so tiny, you would never see it on a group pic ;)


Not the biggest haul but perfectly respectable.

It will keep me out of mischief. :)

The large suitcase will be transformed into a card case for a wedding at some point. 

The doilies are destined to become bunting. 

The stool is gonna get an overhaul. 

The handles are just handy ;)

And I'm just LOVING the heels!

That's all for now folks. 

I'm off together my decorating clobber on  and mix up some chalk paint....

Toodlypip x

Saturday 22 February 2014

Time to put my feet up!

So if you can remember, I bought this recently:


Very VERY comfy but not at all at home in my room. 

Hubster thought it was the ugliest thing he had seen in his life and it was to be 'sorted' ASAP. 


My fabrics got a thumbs down so I decided to crochet a cover instead. 


It was nearly there.  

I noticed the gorgeous shapely legs but they were black and not at all on sync with my room either. 

These have also been given the chalk treatment:


And it is complete!!!


Here is the finished stool:


It looks SO at home and matches my granny square blanket PERFECTLY!!!

Happy days!!!


Friday 21 February 2014

Free stencils?

Hi guys,

Just thought I would do a little post on something I knocked up tonight. 

I wanted a little rose to finish off my display stand. 

I simply found a rose silhouette:
 Then sized it to fit the project, printed on regular paper (I don't have any acetate) and then covered in clear film before using the craft knife. 

Voila:

I will post when the current projects are completed. 

Soooooo many things on the go at the moment :)

The chequered footstool is very nearly complete. I just need to chalk paint and distress the feet. 

The drinks cabinet will be ready for waxing tomorrow. 

And best of all....

I picked this up today:

Yummy, huh?!

Night peeps. X

Thursday 20 February 2014

Coming along nicely.

So in the battle of brush Vs hook, the brush was victorious.  

I decided to tackle The Cabinet. 

Firstly, off came the badly affixed 70s mirror tiles:


Then postie brought my new escutcheons to replace the damaged ones:


I'm considering upcycling these in a pewter effect as feel the black metal is too harsh?

Then out came the glass shelves, mirror and bottom striped glass (which crumbled away upon removal, aargh!)


Then it was time to prepare my colour. I am trying for a French grey (which I am hoping hubster might approve of!). 


And finally I was able to wield the paintbrush!

Everything had its first coat of chalk paint and I used the leftover bit of the first batch to do an initial coat on the nesting tables and the display stand that have been patiently waiting for attention. 


The paint seems to be drying a little lighter than I had hoped so the subsequent coats will be tweaked. 

Now I'm off to clean up... 

Have a nice evening, whatever you are up to x